
My first piece that I made via the brass oxidizing experiment was really, really crude – but it worked up fast. I know my fellow jewelry makers will appreciate the sentiment of just completing a project so that you gain the experience in working with the material – even of the end result is not up to your standards.
The piece turned into two pieces actually – a pair of earrings and a bracelet.

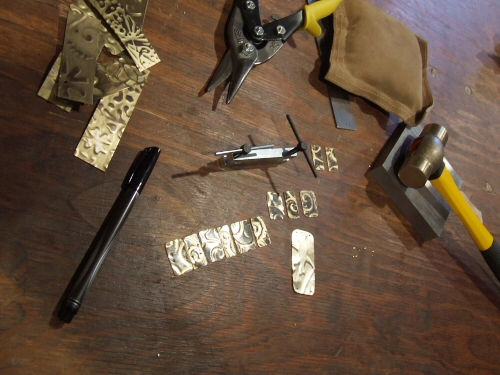
I cut out t he metal using a pair of shears. Then rounded and filed the corners smooth. With a sharpie, I marked where I wanted to punch holes with the screw punch. (You can see another project there on the left working up…for another day. :)). These pictures are straight from the bench, so you see the creative chaos first hand. Sometimes I need to drop what I am doing to develop another idea before I totally forget it. So there are normally many projects on the go at once!

After the holes are punched, I flattened/work hardened the brass using a brass mallet and leather sand bag. Then, the brass pieces were ready for earring assembly…

The completed earrings, with onyx and gold-filled components.

With the rest of the pieces of brass plate, I decided to punch holes – two on each side – and attach together with jump rings.

Sorry terrible pic – but I laid them out staggering the sizes and lightness/darkness from the two brass trophy plates this once was…(and a peek of yet another project in the top right…;)).

Added a magnetic clasp and…there you have it.
These two pieces will be displayed in my workspace as my first ever metal work pieces. I think that it will be neat to see the progression of skill in a few years time. I wish I had of kept the first piece of beaded jewelry I made over eleven years ago! But, I probably sold it! LOL!
Now that I got this get-a-feel-for-techniques project out of the way, my mind is going a mile a minute with ideas. The other projects I am working on involve incorporating the engraver so I am anxious to get them completed and shared. Let’s see how much life gets in the way of play! Stay tuned!


